• Silver Week 2026 – Day 2

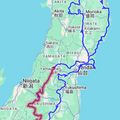
    Nikko to Yamagata

    Weather: sunny then cloudy, 10C in the morning, reaching 29C during the day.
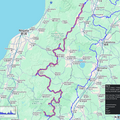
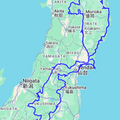
    Distance: 474km
    << Previous Day | Next Day >> | Photo Album | Video

    Today was a day of many closed roads, and a lot of backtracking. But I also enjoyed some really nice scenery and even a bit of culture.

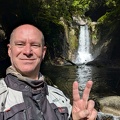
    Woke up at 5 and was ready to go by 5:30! So I took the short detour to tag a BMW Mileage Rally spot which turned out to be a beautiful little lake and cascade waterfall just a bit up from Lake Chuzenji.

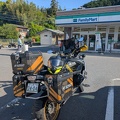
    Then it was time to head along my planned route for the day. Unfortunately it was still too early for the Lake Chuzenji lookout, so I skipped that. At the bottom of the range I stopped at a konbini for a chocolate croissant and a cup of coffee.

    Instead of tagging a new road I decided to enjoy the 169 again over the highlands, and to my first stop, the Ōzasa Farm which was, unfortunately, still closed. This was my planned breakfast stop, so just as well I had a little something a bit earlier.

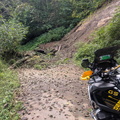
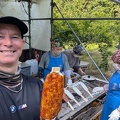
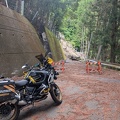
    Heading further up the 169 and the super pretty, albeit slow, 249, I hooked up to the 390, which I had tried to do before but it was closed. It was still closed today, but I tried to take the rindo instead and managed to get most of the way along it, despite a long section of muddy gravel, before I got stopped by a small landslide. With a smaller and lighter bike I might have tried to manhandle it over, but no chance with the Bumblebee.. so I had to backtrack all the way and take a huge detour.. which also meant having to skip a couple of waypoints.

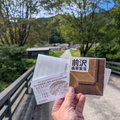
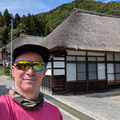
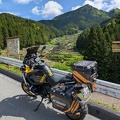
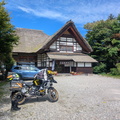
    Eventually I made it to Maezawa village which is famous for its “L-Shaped Farmhouses”. The village is still being actively lived in, but it’s slowly dying out as so many of the small remote farm villages in Japan are due to lack of young people interested in taking over. One of the farm houses has been converted into a small museum, showcasing how it might have looked like in its heyday. I tried chatting to the proprietess, but it’s a bit difficult with my limited japanese. I had a lovely soba lunch and then headed on my way..

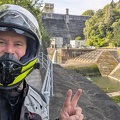
    My next stop was Tadami Dam, not that much further up the road, where I had an ice-cream sprinkled with flower dust while taking in the view. From the top dam you can get a fantastic view over the valley onto the lower dam, which has a small information centrer although it seems to be mostly aimed at kids with some interactive displays.

    From there it was a farily long-haul to my next stop, which I didn’t reach until shortly before dark due to more closed roads, a fuel-stop, a lengthy stop at a hardware store to get some tools to adjust my new phone holder, and some slow traffic. The stop was supposed to be the Lake Shirakawa Submerged Forest, but I couldn’t really see it. The info center for it was already closed, and it was a bit too dark to make anything out. It actually almost looked as if it has been replaced with a camp ground. Certainly didn’t look anything like the pictures on Google Maps – but maybe I just need to try to go there again in daylight!

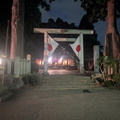
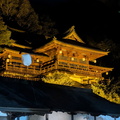
    By now it was more or less dark, so there was nothing much to see until I got to my accommodation, which I reached just after 7pm. Very glad this bike has decent spotlights! I did sneak in a final stop at the Somiya Shrine in Nagai, which is a famous stop with bikers. But unfortunately most of it was all closed up and dark.

    My stay for the night is the Daichi Farm and the hostess made me very welcome. I ended up chatting with the family while I had my dinner (a roll and a beer from a konbini) before having a quick shower and ready for bed! Fingers crossed the weather will hold tomorrow – a typhoon is supposed to be rolling in..


  • Silver Week 2026 – Day 1

    Tokyo to Nikko

    Weather: mostly cloudy, 28C leaving Tokyo to 17C in the mountains
    Distance: 190km

    << Previous Day | Next Day >> | Photo Album | Video
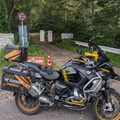
    Left work early and headed up the Arakawa Expressway. Bit of a traffic jam due to a broken down truck, but mostly a good run up the highway.

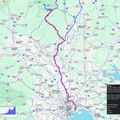
    After turning off I followed several routes until I got to the 15 – I can’t remember doing this one before, but the first half or so is pretty epic. Very scenic with a river to the left and great road. Once it heads up into the mountains it gets narrow, a bit bumpy, and today there was a lot of leaf litter and occasional water run-off, so had to take it pretty slow. It merges onto the 120 (I think?) which is a smooth major road and heads all the way up to Lake Shuzenji, which is where my hotel for the night is.

    Unfortunately the lookout halfway up is closed for renovations, so I couldn’t stop for a break and a cuppa. In fact, even though it wasn’t even 5pm, by the time I got to Lake Shuzenji most everything was already closed, including the cafe which I like to stop at. So I checked into the hotel and enjoyed the free coffee and snacks while catching up on work,

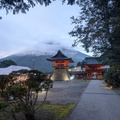
    After finishing work I decided to go for a bit more of a ride to enjoy the lookout over the lake, but it turns out the road up to it is only open between 7am and 5pm.. just not my day for sight-seeing, is it? Instead I stopped at the temple which looked like it was about to close up as well, but the gate was still open.

    I wandered in and as luck would have it, they had a small matsuri (festival) lighting up lanterns and whatnot. I had a little bit of food at the temple – broiled pork and a hot chocolate – while waiting for it to get dark so I could enjoy the lanterns. Unfortunately by the time it got dark they had turned on so many spotlights and other lights that they pretty much drowned out the floating lanterns.. oh well.

    Back to the hotel after failing to find the shop, onsen, blog, and bed (person in the bunk above mine is snoring… I hope I can sleep!)


  • Server Upgrade: Debian 12 “bookworm” to Debian 13 “trixie”

    Overview

    Yes, I know “trixie” has been out and stable for over half a year now. In fact, it’s been running on my desktop shortly after it was released. But servers are another kettle of fish, and in the past it’s taken some time to ensure everything is upgraded and working correctly. So I finally set aside a weekend for the update..

    TL;DR: apart from breaking mariadb, everything went pretty smoothly..

    What worked well

    The standard update steps worked well:

    • apt update && apt upgrade
    • edit all of the `sources.list` to change bookworm to trixie.
    • apt update && apt full-upgrade
    • update various configuration files – vimdiff works very well for this!

    There were no errors or issues, and the system rebooted cleanly with its new kernel.

    What broke

    Part-way through the upgrade, the system ran out of space in /var. While I’m not entirely sure, I suspect that this is what caused mariadb to be broken following the restart. I noticed since neither roundcube nor nextcloud started up following the reboot.

    That’s when I noticed that the database wasn’t running..

    Eventually I managed to rescue the database by using the innodb_force_recovery option. Of course I immediately did a full database dump and then reinitialized the entire database using the dump.

    Despite the database being back up and running, nextcloud still refused to run. This was due to php8.2 having been upgraded, but the php8.2-redis package is not available in Debian 13. I spent quite a bit of time trying various things, including changing to php8.4 which my version of Nextcloud did not yet support. I eventually “fixed” it by simply disabling the redis configuration in Nextcloud..

    The only other thing to break was exim4 because I accidentally duplicated a configuration key while merging the configuration from the upstream maintainer, but this was quickly fixed.

    What I learned (again)

    • ALWAYS take backups, no matter how sure you are that things will go smoothly.
    • Ensure you have enough disk-space. I had checked and thought I had enough, but part-way through the upgrade ran out..
    • Ensure all critical apps are upgraded or can run with the new versions of any dependencies after the system has been upgraded.

    Follow-up Steps

    • Upgraded Nextcloud from 30 to 34, mostly using the web updater, although a few versions required some additional manual twiddling. I wish Nextcloud would have Long Term Service (LTS) releases..
    • Switched the system to php8.4 and removed php8.2
    • Upgraded Piwigo from 14.5 to 16.4

    There may be more things which I need to tweak/fix over the coming weeks, but the essentials are working – web, email, cloud, and photo albums.


  • Upgrading Urutu – my home desktop

    After 8 years of service, Urutu got an upgrade of its core components. While the old hardware was still going strong, and capable of handling most tasks, a KDEnlive render task projected to take 23 hours finally convinced me that it was time to get some new parts.

    Urutu is on PCPartPicker:

    Main upgrades

    ItemOldNewPrice
    CPUi6700kRyzen 9900X¥69,980
    MotherboardAsus Hero Maximum VIIIASRock Phantom Gaming X870E Nova WiFi¥50,373
    RAMG.Skill Ripjaws 32 GB CL14G.Skill Trident Z5 Neo RGB 64 GB CL28¥48,566

    Even without converting to 2019-money, this upgrade was significantly cheaper than the last one, coming in at well under £1000 for near-top-of-the-range components.

    I am still waiting on a “new” GPU as well, a friend has an old GTX3090 which will be a nice upgrade from the 1080, although nowhere near as top-line as the rest of the components.

    What worked well

    Overall it took some time, mostly due to the custom water loop, but the upgrade went pretty smooth.

    • all the old components and the case still work perfectly, although I did get new 12cm case fans as well
    • making sure Windows was up-to-date and cloud-activated ensured it continued working after the upgrade
    • the new PC is blisteringly fast, near the top of most of the benchmarks in “HardwareInfo2” on Linux. My CPU benchmarks beat other Ryzen 9900X entries for some reason.

    Issues

    I encountered a couple of very minor issues during the build.

    Water loop

    Most of the work was taking apart the custom water loop and rebuilding it, but this was also a good opportunity to replace all of the tubing as it had yellowed quite badly in the meantime. I made a mistake and fitted the CPU waterblock the wrong way up due to cable routing. What I thought was just cosmetic turned out to be practical as an air bubble gathered at the top of the block.

    Cabling

    There’s some minor cabling issues due to the different board layout, mostly with fan cables not being long enough, so extension cables were needed. This time I also went for more (A)RGB components and these also required some extensions and splitters. In retrospect I made a mistake with the new case fans which should have been A-RGB instead of plain RGB.

    As a result, the rear of the machine is a lot messier than the previous build.

    OS Issues – Windows 10

    I should have removed all the Asus-specific software prior to changing the hardware as some of the (un)installers refuse to work now that they don’t detect the Asus motherboard anymore. It’s left a bit of a mess so short of reinstalling Windows (not really an option) I’ve been fighting to clean up the Asus software.

    OS Issues – Debian GNU/Linux 13

    For some reason when I upgraded to Debian 13 recently it left me on an older kernel, which did not have drivers for the new Realtek network card. After a bit of faffing about I managed to get a driver for it, got networking up and running, and then upgraded to a current kernel and no issues.

    Apart from that I had to remove a couple of modules which were specific to the old motherboard.

    Final Thoughts

    So far very happy with the upgrade, looking forward to fixing the CPU waterblock and getting new benchmarks once I get the “new” GPU.


  • Mocking system functions in C++ with GoogleMock

    Once you know how, it’s pretty easy to write unit tests and mock system functions in C++ using GoogleTest.

    But getting all the information together in one place is a bit tricky and there are a couple of gotchas. This article gives a brief overview.

    System Functions

    So what are system functions anyway? These are the APIs which your operating system provides, such as open(), read(), close(), etc. Most non-trivial code bases will call various system functions in order to implement its functionality.

    Intercepting system functions

    There are multiple approaches to testing code which calls system functions:

    1. Place all system calls into wrapper classes. You now have a standard C++ class which you can mock in the normal way. The con is that you have to rewrite the code to use the wrapper class instead of calling the system functions directly.
    2. Use precompiler tricks to overwrite the calls to the system functions. This is only possible if you can inject the precompiler definitions into the code to be tested and recompile.
    3. Use the linker --wrap= option to wrap the functions you’re interested in. This is the approach we’ll use in this article as it is the least intrusive to the codebase and can even be used on precompiled object files.

    Wrapping function calls

    In order to wrap a function, linkers provide the --wrap=<function> command line parameter. This is a quite common approach when coding in C and wanting to trace or instrument system function calls.

    When specified, each call to function is replaced with a call to __wrap_function instead. The real function is still available via __real_function. It is common to call the real function from within the wrap function as well as adding some additional functionality.

    For example:

    #include <dirent.h>
    
    int __wrap_stat(const char *filename, struct stat *stat)
    {
      printf("stat(%s, %p) called\n", filename, stat);
      return __real_stat(filename, stat);
    }

    C++ Gotcha! Name Mangling

    In C++ there’s a gotcha with this approach – name mangling! All C++ symbols get name-mangled to ensure that they don’t conflict. But when using the linker “wrap” feature, the names must be exactly as above. Luckily C++ provides the extern "C" mechanism to turn name mangling off for sections of code.

    So in C++ we can do the following:

    #include <dirent.h>
    #include "mocks/dir_mock.hpp"
    
    extern "C" {
    
    int __wrap_stat(const char *filename, struct stat *stat)
    {
      printf("stat(%s, %p) called\n", filename, stat);
      // Invoke the mock if it is active
      if (FileMock::instance != nullptr) {
        return FileMock::instance->stat(filename, stat);
      }
      // Otherwise call the real implementation
      return __real_stat(filename, stat);
    }
    
    } // extern "C"

    Linker wrap flags using CMake

    CMake is a popular meta-build system and as of CMake v3.13, it is fairly easy to provide linker flags to the build process using the target_link_options() setting.

    cmake_minimum_version(3.13)
    
    add_executable(my_test ...)
    target_link_options(my_test
      PRIVATE
        LINKER:--wrap=stat
        LINKER:--wrap=...
    )

    Writing the mock

    With the wrapped functions above and the build system configured correctly, it is now pretty easy to create a mock class for use in the unit tests:

    class FileMock {
      static *FileMock instance;
      DirMock() { instance = this; }
      virtual ~FileMock() { instance = nullptr; }
      MOCK_METHOD(int, stat, (const char *filename, struct stat *stat));
    }

    Add more mock methods as required, making sure to provide the wrapped functions as well.

    NOTE: The static instance member must be declared in an implementation file somewhere; the file containing the wrap functions is a good candidate.

    Writing the tests

    We can now write unit tests which use the mock class instead of running against the real system.

    TEST(StatTests, test_stat_real_directory) {
      struct stat s{};
      ASSERT_EQ(0, stat("/tmp", &s));
      ASSERT_TRUE(S_ISDIR(s.st_mode));
      ASSERT_NE(0, stat("/invalid_directory", &s));
    }
    
    TEST(StatTests, test_stat_mock_directory) {
      FileMock fm;
      EXPECT_CALL(fm, stat(::testing::StrEq("valid_dir"), ::testing::_)
        .WillOnce([](const char* path, struct stat* s) {
          if (s) {
            memset(stat, 0x00, sizeof(*s));
            s->st_mode |= S_IFDIR;
          }
          return 0;
        });
      EXPECT_CALL(fm, stat(::testing::StrEq("invalid_dir"), ::testing::_)
        .WillOnce([](const char* path, struct stat* s) {
          errno = ENOENT;
          return 1;
        });
    
      struct stat s{};
      int rv = stat("valid_dir, &s);
      ASSERT_EQ(rv, 0);
      ASSERT_TRUE(S_ISDIR(s.st_mode));
    
      rv = stat("invalid_dir, &s);
      ASSERT_NE(rv, 0);
      ASSERT_EQ(errno, ENOENT)
    }

    As the example shows, it is trivially easy to select between invoking the real implementation versus the mock implementation simply by constructing, or not, an instance of the mock class in the unit test.

    C++ Gotcha! Mock Parameter Validation

    In the example above we see (or rather, don’t see, as it’s already been compensated for) another C++ Gotcha: parameter validation in EXPECT_CALL mock function calls.

    It is essential that the correct Matcher is used to validate parameters. In the case above, if the StrEq() Matcher wasn’t being used, C++ wouldn’t compare the strings, as one might expect, but it would compare the pointers! Even though the pointers point to the same string value they are different and hence the mock call would fail.

    Wrapping up

    So in summary, to unit test your code with mocked system calls:

    1. Wrap the system call(s) which your code invokes
    2. Write a mock class containing mock methods for each system call
    3. Implement the wrapped system call(s) to call the mock method
    4. …
    5. Win!

    Example

    The inspiration for this article was the research I did to write a small Directory Iterator class. The full example with unit tests is available here.


  • Upgrading “boa” from Debian 11 to Debian 12

    After being nagged for months that Debian 11 was no longer supported, I finally bit the bullet and used a long weekend to start upgrading my cloud server.

    Overall it went smoothly, as expected with Debian.There was the usual merging-in of various configuration files with the updated package-maintainers versions compared to my own modified versions, but apart from taking time there were no major surprises.

    I did have two issues though:

    1. Owncloud
    2. LDAP

    Owncloud

    This one was mostly my own fault.

    I performed the system upgrade first, which upgraded PHP from 7.4 to 8.2. This resulted in the ancient version of Owncloud that I was running in no longer running, as it did not support PHP 8.2. I should have upgraded Owncloud before upgrading the server.. Something to remember for next time!

    A fair amount of muddling about and I managed to install PHP7.4 and the various dependencies which Owncloud needs from a third-party repository in order to finally manage to run the manual upgrade process.

    Still couldn’t log in though as LDAP was broken..

    LDAP

    Debian 12 upgraded OpenLdap to version 2.5 from 2.4. This included some breaking changes, which required manually editing the backed-up LDAP data before being able to import it again.

    Various websites gave some information, but in the end, the README which was installed on the server itself ended up being the best resource, and I was finally able to re-import my LDAP data.


  • Hiroshima Tour – Day 10

    Kameyama to Tokyo

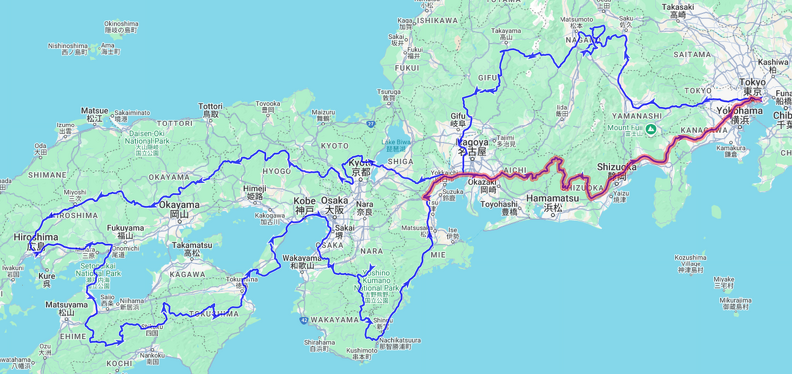
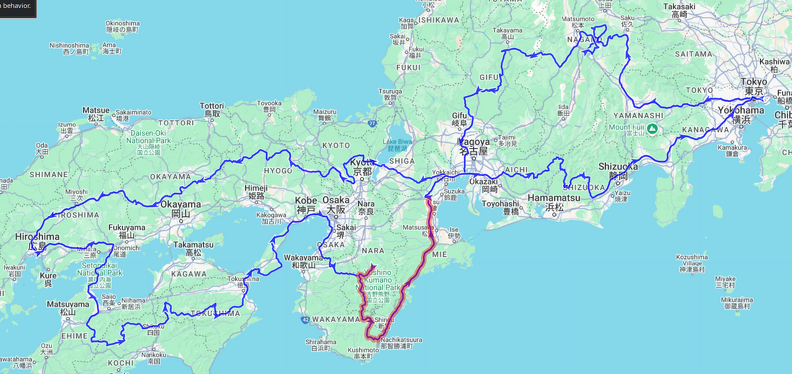
    Hiroshima Tour Route Map - Day 10

Length: 583km, ↗11010m, ↘11055m
Time: 15:23:54h, Speed: 38km/h
Moving: 10:22:05h, Speed: 56km/h

Start: Sunday, 11 May 2025 05:58:42 JST
End: Sunday, 11 May 2025 21:22:36 JST
Points: 8733 (8733)

    << Previous Day | Next Day >> | Photo Album | Video
    • Weather: Mostly sunny
    • Ride: 583km; highway past Nagoya, then windy roads all day (some closed), followed by highway through Tokyo
    • Stay: home

    Woke up fairly early, but I had heard Ben leave even earlier. Despite not having a shared room for the last night there was no mistaking his bike! I got ready and was on the road in glorious sunshine shortly after 6am to try to avoid the traffic around Nagoya.

    Combini Breakfast after getting off the highway through Nagoya.

    Skipping breakfast it was, after a couple of wrong turns in Kameyama, straight onto the highway for a pretty smooth ride past Nagoya. While there was some traffic about, it wasn’t too heavy and I made good time. By 7:30 I was off the highway and stopped at a combini before heading up into the mountains and smaller roads – time for the customary coffee and sandwich brekky!

    My plan for today was to mostly to just keep off the highway back to Tokyo, so I strung together a bunch of smaller roads which roughly ran parallel to the highway a bit north of it, winding their way through the moutains.

    At Habu Dam on Lake Mikawako
    At Narusawa Falls on Route 420.

    The first stops were Habu dam and the shores of lake Mikawako, which is quite a large reservoir and seems popular with camping and watersports. Next was Narusawa Falls just off Route 420, which is below the road bridge, but to get to it it’s actually inside a camping area. When I got there they had just started a party with some thumping good music and a dance area overlooking the falls. I chatted to a couple of guys briefly, seems they were mostly regulars to the event. Reminded me a bit of our motorbike rallies, except with cars.

    At the Yotsuya Senmaida Rice Terraces

    My next stop, and one which ended up taking a LOT longer than I had planned for, were the Yotsuya Rice Terraces. There’s viewpoints both from below as well as from above, and there seemed to be quite a bit of activity today with farmers working the terraces and several tourists wandering about. I chatted to a couple of guys who turned up on bikes, one on a nice old R100 BMW.

    At the Yotsuya Senmaida Rice Terraces

    A couple of ladies were running a stall selling yakimochi (grilled rice cakes), but they were just starting up when I got there. So it took a good 20 minutes or so before the first batch was ready, during which time I mostly just chilled and enjoyed the ambience. The yakimochi ended up being delicious!

    At the Yotsuya Senmaida Rice Terraces

    My next stop was the Sakuma Dam and the electric power museum, but it turns out the road leading past the reservoir was closed. There had been a landslide and they were still working on clearing and repairing the road. The road was already mostly cleared and, being Sunday, there was nobody around, so I snuck past the barriers and a bulldozer and went through the closed-off section rather than taking a very large detour. Naughty-naughty! But it was very nice having the dam road all to myself, with some impressive views out over the dam itself.

    At the Yotsuya Senmaida Rice Terraces

    Sakuma dam was pretty impressive and the electric power museum is built on a hillside overlooking the dam. The museum is free, but unfortunately it’s all in japanese. It’s still worth a quick little look, if only for the lookout over the dam from which you can hear a pretty impressive triple echo if you shout or clap into the valley.

    Another road, another road closure..

    My onward journey was dogged by several more closed roads. I tried sneaking through one again on Route 362, but it was also closed because of a landslide which looked much more serious than the one earlier today, and had had no attempts to clear it yet so I had no option but to find a detour. Luckily it wasn’t too much of one in this case.

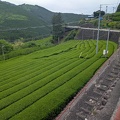
    Green tea plantations on Route 362.

    The entire area has green tea plantations, which I had not really seen before in Japan. I confirmed it by asking a couple of farmers who had just stopped their little K-truck and gotten out as I was taking a picture. Apparently it’s harvest season for the green tea.

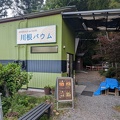
    A small tea house near the Shiogō suspension bridge on Route 77.
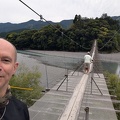
    On the Shiogō suspension bridge.

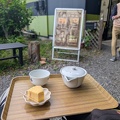
    I was pretty much on the final stretch back to the highway, it having gotten much later than planned by now, when I saw a pretty big pedestrian suspension bridge, so I decided to have one final stop. There was a little tea-house nearby and the kind owner made me a tea despite being in the middle of closing up shop. He tried to explain a little about the local teas and showed me the proper way to brew it. As well as enjoying a tea and a piece of baumkuchen I also bought some of the local tea.

    A small tea house near the Shiogō suspension bridge on Route 77.
    A small tea house near the Shiogō suspension bridge on Route 77.

    I was pretty much on the final stretch back to the highway, it having gotten much later than planned by now, when I saw a pretty big pedestrian suspension bridge, so I decided to have one final stop. There was a little tea-house nearby and the kind owner made me a tea despite being in the middle of closing up shop. He tried to explain a little about the local teas and showed me the proper way to brew it. As well as enjoying a tea and a piece of baumkuchen I also bought some of the local tea.

    A small tea house near the Shiogō suspension bridge on Route 77.
    On the Shiogō suspension bridge.

    The suspension bridge, it turned out, was the longest over the Oi river and heavily used by the locals before the road bridges were built to get between the town on one side of the river and the train station on the other. A family with several young kids were crossing it when I was there, the older ones running back and forth with the younger ones being a bit more cautious and clinging to their parents. I gave the young boy a high-5 and told him how brave he was being.

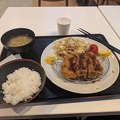
    Tonkatsu dinner at the Numazu highway rest stop on the Shin Tomei Expressway (E1A).

    From there it wasn’t too much longer back down to the highway – just as well as it was getting dark. Highway is boring, but in the dark it’s much better than bumming around little mountain roads! I stopped at one of the highway rest stops for dinner before getting into Tokyo and doing the usual loop of inner-city highways to my end of town.

    Safely back home after the 10-day Hiroshima trip!
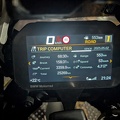
    Hiroshima Trip - final trip meter.

Total distance: 3360km
Total time: 10 days

    Home at last! What an epic trip, nearly 3500km’s, a couple of rainy days but overall good weather, and some amazing sights and experiences. Loved it and hoping to do more trips like this one.


  • Hiroshima Tour – Day 9

    Dorogawa to Kameyama

    Hiroshima Tour Route Map - Day 9

Length: 331km, ↗5555m, ↘6335m
Time: 09:11:54h, Speed: 36.0km/h
Moving: 06:35:15h, Speed: 50km/h

Start: Saturday, 10 May 2025 08:30:45 JST
End: Saturday, 10 May 2025 17:42:39 JST
Points: 5019 (5019)

    << Previous Day | Next Day >> | Photo Album | Video

    • Weather: Wet, then rainy, clearing by late afternoon
    • Ride: 331km; nice windy roads down to Nachi, then an incredibly boring highway to Kameyama
    • Stay: Tabist Kameyama Daiichi Hotel; just a business hotel with no undercover parking for bikes.

    Dorogawa Onsen - breakfast at Marubun hotel.

    Woke up relatively early and moved back into my allotted room. Our original bedroom was very bright due to a hallway light, and Ben had already relocated into our sitting room, so I had snuck myself and my futon into the unused room next door, where I had a great night’s sleep. I did a bit of blogging and then a quick onsen before breakfast. We had decided to leave a bit later today to allow the rains to clear.

    We set off around 8:30 and enjoyed some nice, albeit wet, roads. About an hour away from Nachi we parted ways as I decided I wanted to explore a more windy road while Ben preferred to stay on the main roads in the wet. Again, his decision was the correct one as the road I chose, while initially fantastic, soon turned into quite a challenge, being very narrow with lots of debris on it. It wasn’t quite one of the abandoned roads I’ve explored previously, but it was well on its way to becoming one. Still, there were some amazing views, amongst them a nice waterfall in a river bend with some rice fields in the foreground, an abandoned village with rice terraces now overgrown by trees, and some awesome views into the surrounding valleys.

    In the middle the road suddenly became better and I encountered a group of work trucks and some people repairing a power line. I have no idea how the trucks got there because the road soon turned pretty bad again, and I’m sure all approaches were not suitable for truck traffic. I guess they must have managed somehow.. Nearly at Nachi I crested one last rise and unexpectedly found a lookout, shrouded in mist, where a couple of British tourists had hiked their way to. Poor buggers – they found the same conditions that they had left behind, cold and rain..

    At the Nachi waterfall and temple complex.

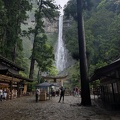
    I ended up arriving nearly an hour after Ben at Nachi due to the much worse than expected roads and we quickly went up to see the waterfall. It is the highest free-falling waterfall in Japan, at 133m drop. It is also considered to enshrine the local deity. All up very impressive. We spent some time just admiring the sheer spectacle.

    After a quick lunch we jumped back on our bikes for the stretch up to Kameyama, which we did mostly via expressways and highways. For what it’s worth, the E42 is dreadful – don’t get me wrong, it’s a good quality road, but about 80% is tunnels and dual-way with little to no overtaking opportunities, so rather unsuited for motorbike touring. Still, it’s a way to get from A to B relatively quickly by Japan standards.

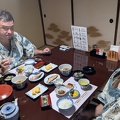
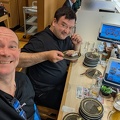
    Converyor belt sushi dinner in Kameyama.

    Notwithstanding a minor routing mishap, we arrived at our accommodation in good time, checked in, and then had a conveyor-sushi dinner.

    Time for bed.. Ben and I will split ways tomorrow as he wants to get up very early and highway it home as quickly as possible, whereas I will take the more scenic option at least until Mt Fuji.